Sunday, April 25, 2010

Thank-you card and Bookmark


I do like dry embossing --but it gets a bit tedious when producing multiple cards.  So Dee and I went shopping during the Christmas Break and bought me a toy!  (One of the reasons Diane likes to visit is because we go shopping!)

I got a Sizzix Texture Boutique...
http://www.sizzix.com/textureboutiquetv

I used this new toy for the 'thank-you' notes I made after Christmas.

Materials:
  • cream cardstock base (approx 6" x 5")
  • narrow blue ribbon
  • blue eyelet
  • envelope- regular letter sized - No. 6 3/4
  • glue
  • blue paper

 Equipment:
  • Sizzix Texture Boutique
  • Sizzix Snowflake embossing folder
  • Sizzix Snowflake Paddle Punch
  • eyelet setter
  • hammer
  • Fiskars Rotary Trimmer with straight blade and wave blade
  • computer


Directions-Card:
  1. Using the computer, print the inside sentiment and "made by..." information on to the card base, line up the printing for a 6" x 3" card
  2. Place the card base into the embossing folder
  3. Following the Texture Boutique directions, sandwich the card and embossing folder between the pressure plates and insert into the machine
  4. Roll the packet through the machine
  5. Removed card from the pressure plates and embossing folder
  6. Using the Fiskars Rotary Trimmer, straight cut the back of the card to slightly over 3"
  7. Using the Fiskars Rotary Trimmer, wave cut the front of the card at 3"


Directions-Bookmark:
  1. Using the trimmed off piece of the front of the card, wave cut the straight edge to make the bookmark (both long edges should now be wave cut)
  2. Using the eyelet setter and hammer, insert blue eyelet at the top of the bookmark
  3. Thread narrow blue ribbon through the eyelet and tie knot at ends


Directions -Envelope:
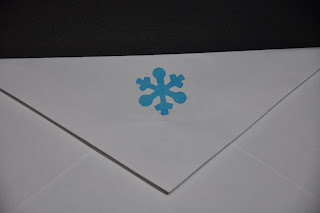
  1. Using the paddle punch and hammer, punch a snowflake into the flap of the envelope
  2. On the inside of the flap, glue a small square of blue paper to stabilize and highlight the punched shape


Christmas Card 2009

I know that it's well past Christmas, but there are a couple people who have been waiting for the directions for this card.

I sent this to my staff and tucked inside was an invitation to our Holiday Open House.  It was a square cream colored piece of cardstock, with the computer printed invitation, using computer clipart snowflakes that matched the snowflakes and mittens clipart used on the card.

I have a picture of the card but not the insert-- I'll leave that to your imagination!

Materials:
  • cream cardstock card base
  • cream cardstock
  • blue cardstock
  • silver or white shimmer 2" wide ribbon
  • snow flake garland (made for mini trees)
  • narrow blue ribbon (match the blue card stock)
  • double sided tape
  • form adhesive square
  • paper glue
Equipment:
  • brass snow flake stencil
  • embossing tool
  • light box
  • square squeeze punch
  • computer
Directions:
You can use any size card stock base
  1. Using the computer - Print the inside sentiment onto the card base
  2. Also print the "made by..." information on the outside back of the card base -- if desired
  3. Cut the blue card stock to cover the front of the card fully
  4. Cut the cream card stock approximately 1/2 inch smaller than the blue card stock
  5. Using the light box, dry emboss the cream card stock piece with the brass snowflake stencil and embossing tool around the edges (the edges that will not covered by the  'window')
  6. Attach the now embossed cream card stock to the blue card stock using glue
  7. Before attaching the blue card stock to the card:
    • Wrap the blue ribbon around the back of the blue card stock and tie in front
    • Attach the snowflake (cut one from the garland) with 1/2 of the form adhesive square
    • Cut a smaller square of blue card stock and using the square squeeze punch make the 4-pane window
    • Cut a piece of the 2" shimmer ribbon
    • Place double sided tape on the back side of the window
    • Press shimmer ribbon (cut to size) to the back side of the window piece
    • Then press the window onto the card
    • Print the "Let it snow!" tag on a printer using the mitten clipart
    • Cut tag with deckle edged scissors
    • Attach tag to window corner with 1/2 of the form adhesive square
  8. Attach the completed blue card stock piece to the front of the card using double sided tape
  9. Address envelop before inserting
  10. Extra postage will be needed due to the snowflake embellishment 

Tuesday, April 20, 2010

Changing blogspots around-sorry for the confusion

Hi all
I am changing this blog spot over to my craft blog.  Please find my personal blog information - including the blogs already written at http://www.annandcarol.blogspot.com/

Thanks
Ann