I do like dry embossing --but it gets a bit tedious when producing multiple cards. So Dee and I went shopping during the Christmas Break and bought me a toy! (One of the reasons Diane likes to visit is because we go shopping!)
I got a Sizzix Texture Boutique...
http://www.sizzix.com/textureboutiquetv
I used this new toy for the 'thank-you' notes I made after Christmas.
Materials:
- cream cardstock base (approx 6" x 5")
- narrow blue ribbon
- blue eyelet
- envelope- regular letter sized - No. 6 3/4
- glue
- blue paper
Equipment:
- Sizzix Texture Boutique
- Sizzix Snowflake embossing folder
- Sizzix Snowflake Paddle Punch
- eyelet setter
- hammer
- Fiskars Rotary Trimmer with straight blade and wave blade
- computer
Directions-Card:
- Using the computer, print the inside sentiment and "made by..." information on to the card base, line up the printing for a 6" x 3" card
- Place the card base into the embossing folder
- Following the Texture Boutique directions, sandwich the card and embossing folder between the pressure plates and insert into the machine
- Roll the packet through the machine
- Removed card from the pressure plates and embossing folder
- Using the Fiskars Rotary Trimmer, straight cut the back of the card to slightly over 3"
- Using the Fiskars Rotary Trimmer, wave cut the front of the card at 3"
Directions-Bookmark:
- Using the trimmed off piece of the front of the card, wave cut the straight edge to make the bookmark (both long edges should now be wave cut)
- Using the eyelet setter and hammer, insert blue eyelet at the top of the bookmark
- Thread narrow blue ribbon through the eyelet and tie knot at ends
Directions -Envelope:
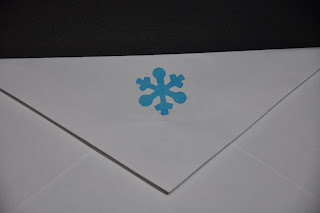
- Using the paddle punch and hammer, punch a snowflake into the flap of the envelope
- On the inside of the flap, glue a small square of blue paper to stabilize and highlight the punched shape


No comments:
Post a Comment